Help / Apply a Print Template to Other Prints
Set a Model Print and Apply it to Other Prints
Starting from a model print that serves as your reference, you can apply the same settings to other prints in your cart.
From the configuration page, we offer several practical solutions, either before or after uploading your images, ranging from the simplest to the most complete.
Please note that our website does not handle more than 500 prints per order. We kindly ask you to split large batches of prints into multiple orders. Feel free to contact us if needed.
Prepare your files in advance to the desired dimensions
You can set your print dimensions before uploading your images.
When you upload a JPEG or TIFF file to our site, we take into account the height x width dimensions specified in your file.
Once your image is uploaded to the configuration page, we automatically apply those dimensions to your print.
For example, if your file contains a specification of 13 cm height by 18 cm width, we will automatically apply those dimensions to create a 13x18 cm print.
To set print dimensions in your images, we recommend using image editing software (Adobe Photoshop, Adobe Lightroom, GIMP, etc.).
Note that this preparation is not mandatory: once your images are uploaded, you can adjust the dimensions of your prints as desired on the configuration page.
Your Model Print from a Print Without an Image
You can define a model print before uploading your images.
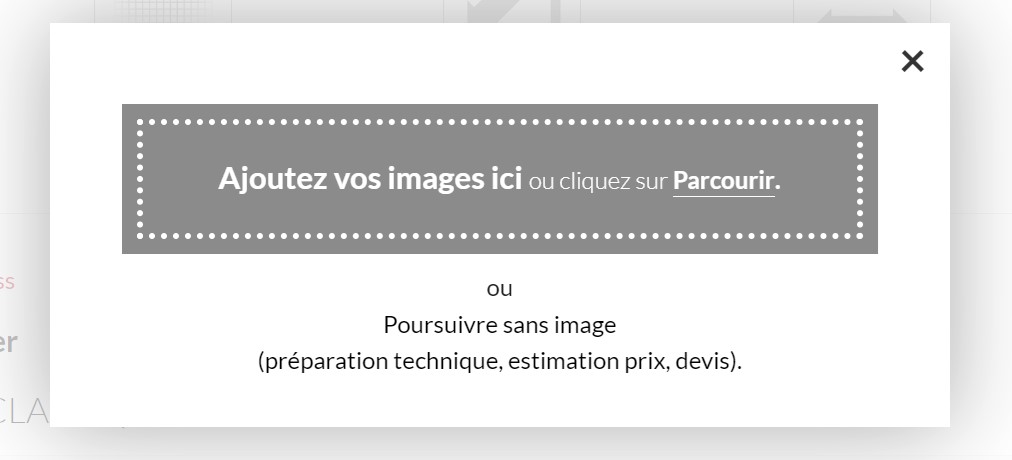
Once the product and paper type are selected, click the green Add button. A window will appear: "Add your images here..." or "Continue without image (Technical preparation, price estimate, quote)".
Click "Continue without image...".
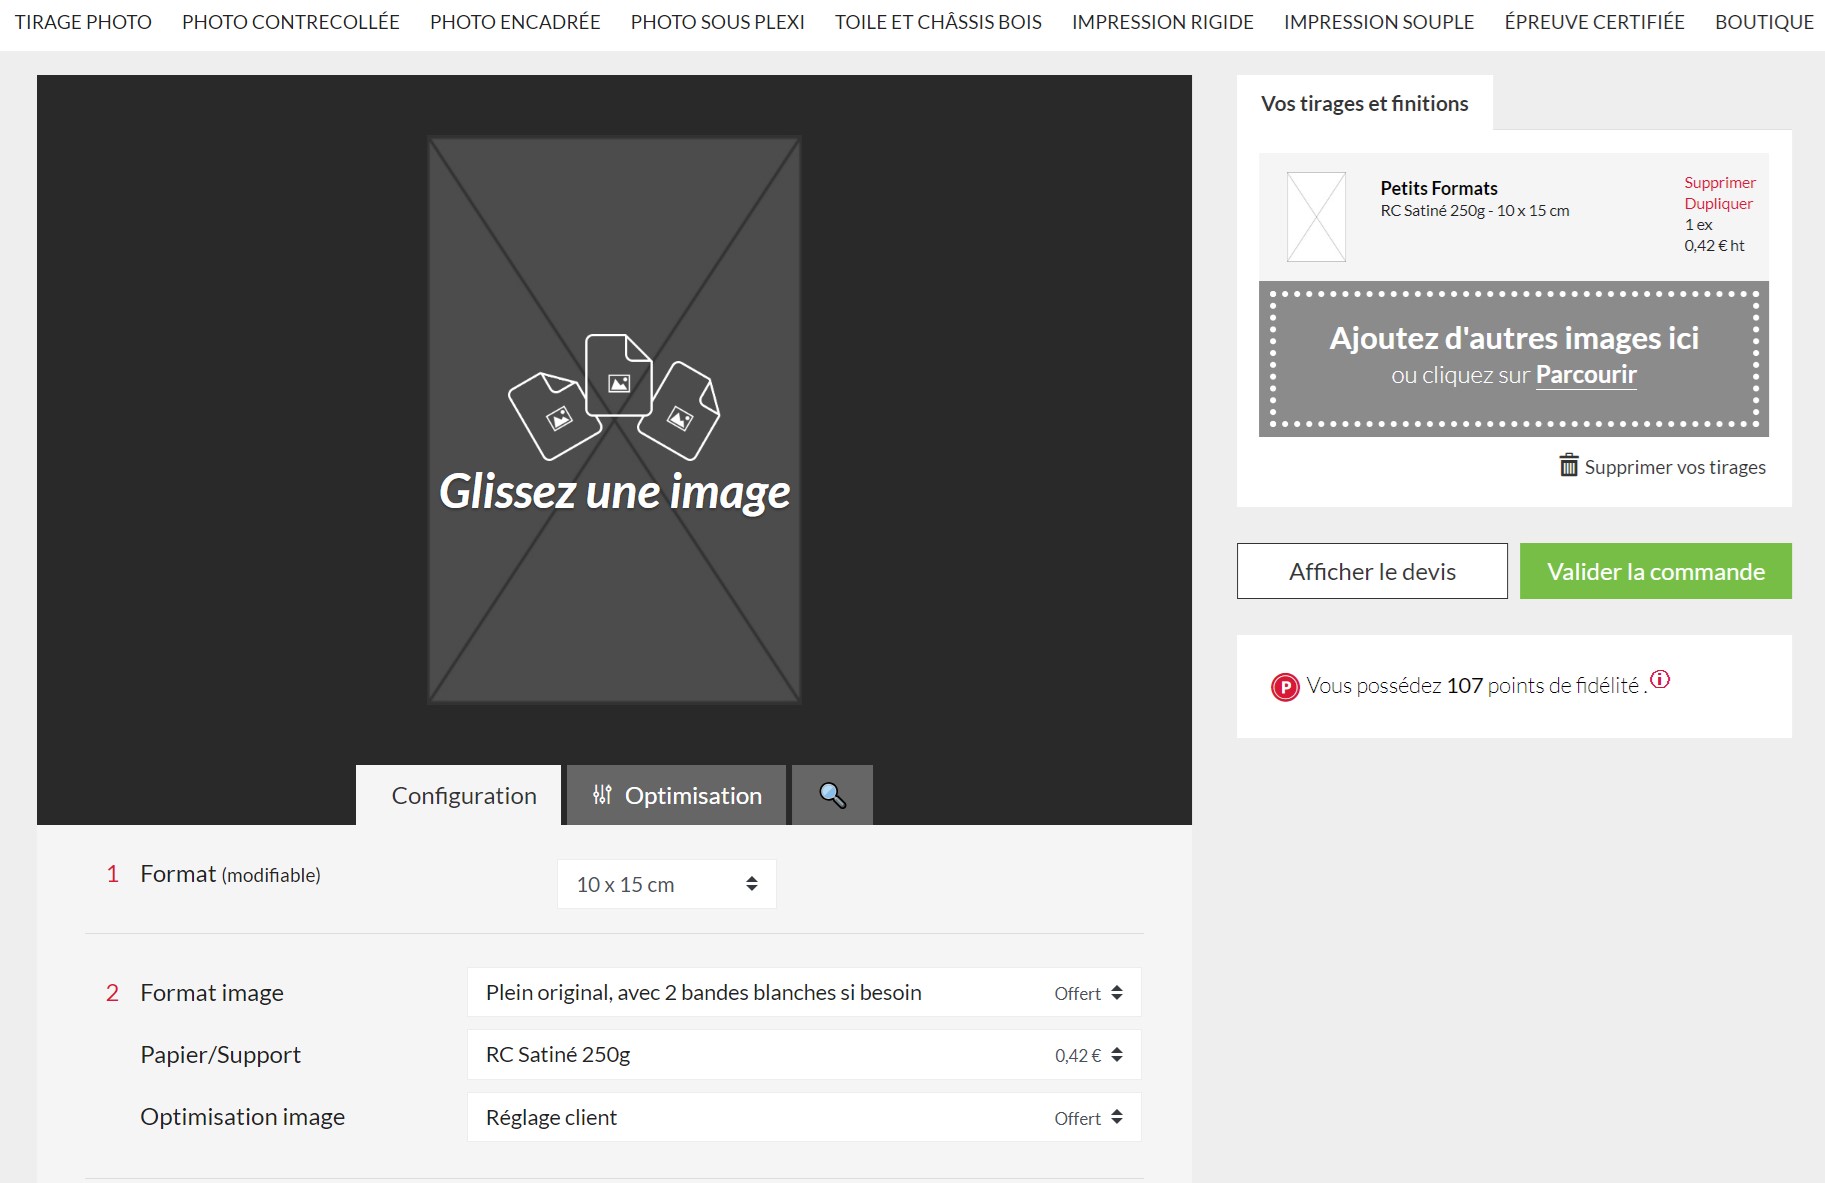
Configure this image-free print with the desired dimensions and options; it will become your model print.
Then click on the gray box on the right "Add other images here or click Browse".
Select and upload the series of images you want to match your model print.
Your prints will all automatically be configured identically to your image-free model print.
If you have a second batch of prints to prepare with different dimensions and options, you can go back to the settings of your image-free print, modify them, and then select another series of images.
All prints will be configured identically to your updated image-free model print.
Important: once your batches of prints are prepared in your cart, don’t forget to delete the image-free print. Otherwise, you will not be able to validate the order because one print will be empty.
We offer two functions in the print setup page: "Define template" and "Apply to all" for a precise and quick application of a template print setup to a batch of prints.
"Apply to all" has evolved but remains on the same principle with additional options. If you wish, you can also select the application of certain parameters of the template configuration and/or select the images concerned.
-
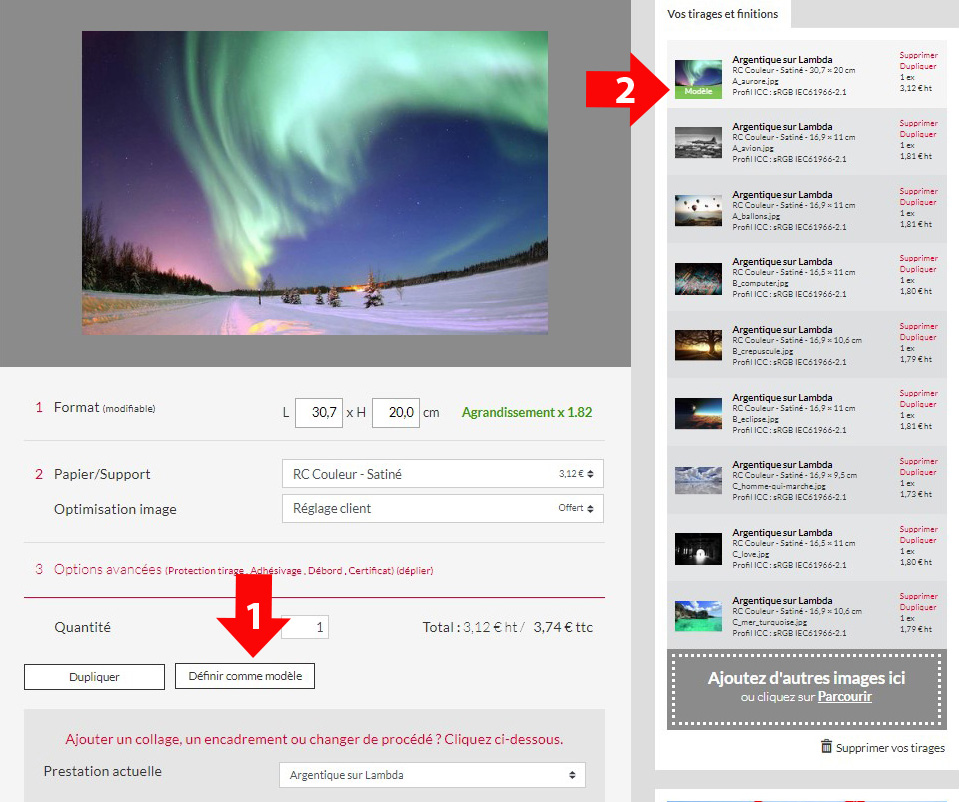
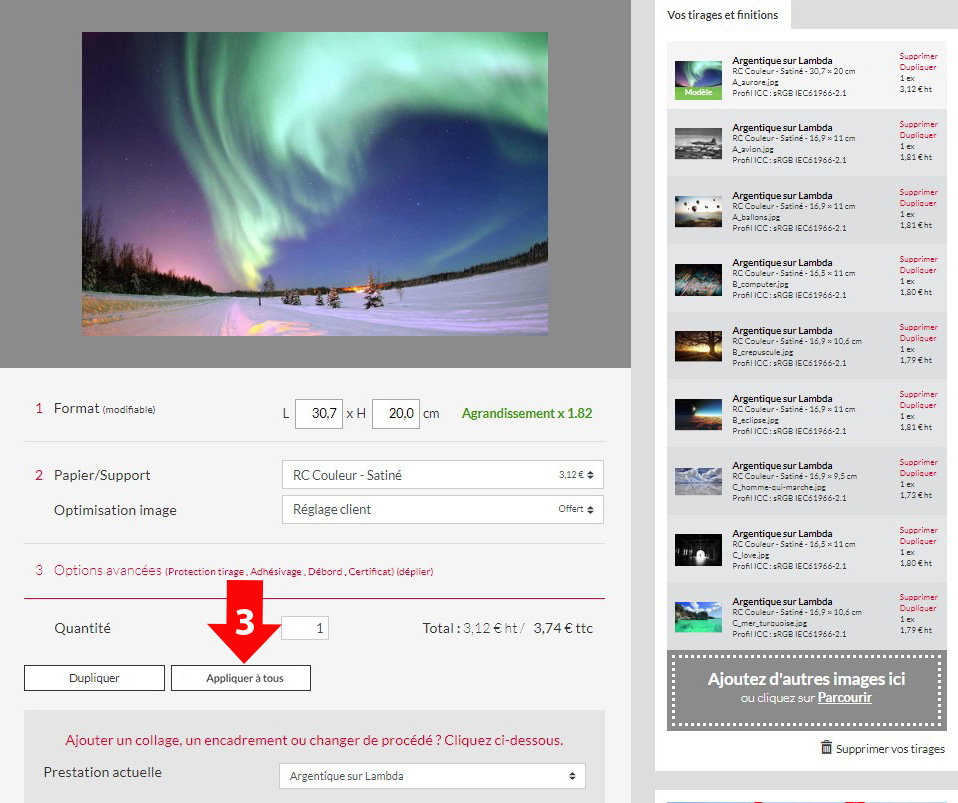
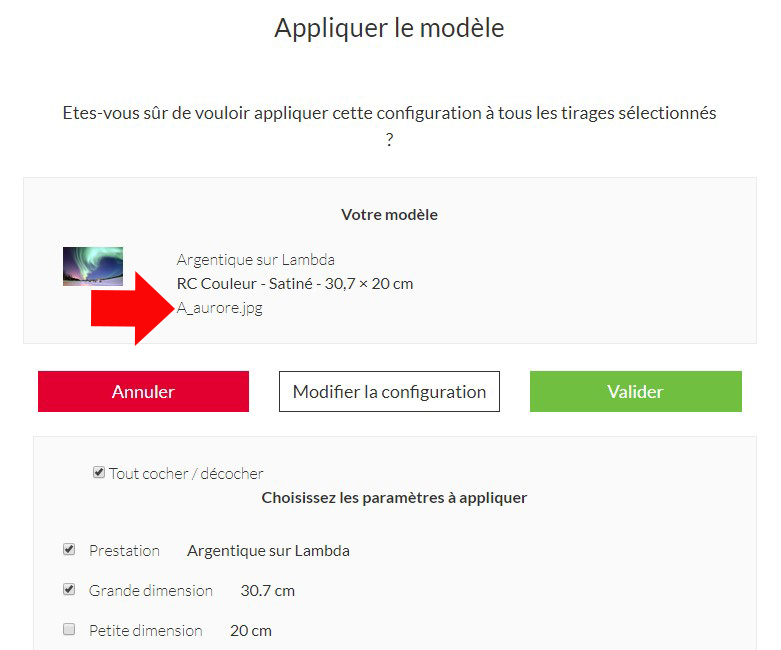
1. After uploading your images, you select the image in your shopping cart that will become your sample print and then in the settings page you indicate the elements necessary for the preparation of your sample print (service, paper, finishing, format, quantity, advanced options, etc.).
-
2. At the bottom of the settings page, click on "Define as template": your set print becomes a template print.
-
3. Still at the bottom of the settings page, to apply all or part of the configuration of your print template to other prints you click on "Apply template".
-
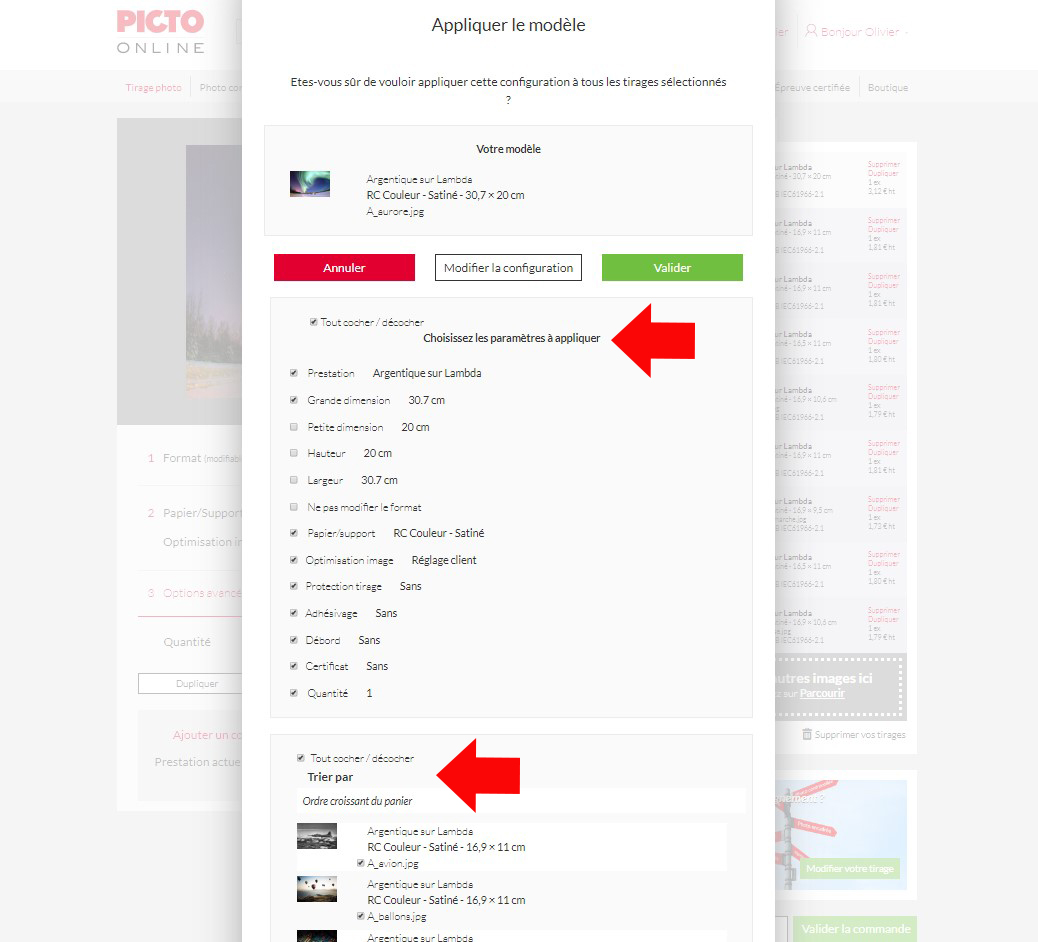
4.A new window invites you to continue applying the entire template configuration to all the prints in your basket. Click on "Validate" if this is your case.

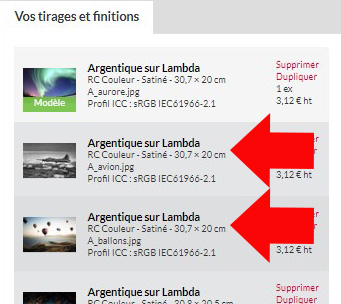
All the prints in your basket are now in the sample print configuration.
-
5. To refine the application of the configuration to other prints you can click on "Modify the configuration", the window then displays two new parts:
-
«"Choose settings to apply" with all the settings of the sample print.
-
«"Sort by" displays the list of prints in your basket.
-
-
6. Using the check/uncheck boxes, you select the desired settings and prints. You can also use the "Check/uncheck all" boxes to quickly select your choices.
Manage multiple print batches with multiple templates
If you want to go further, we propose here a method to manage more easily several print batches to be set up with several templates. You can of course use other methods as you wish.
Preparing file names
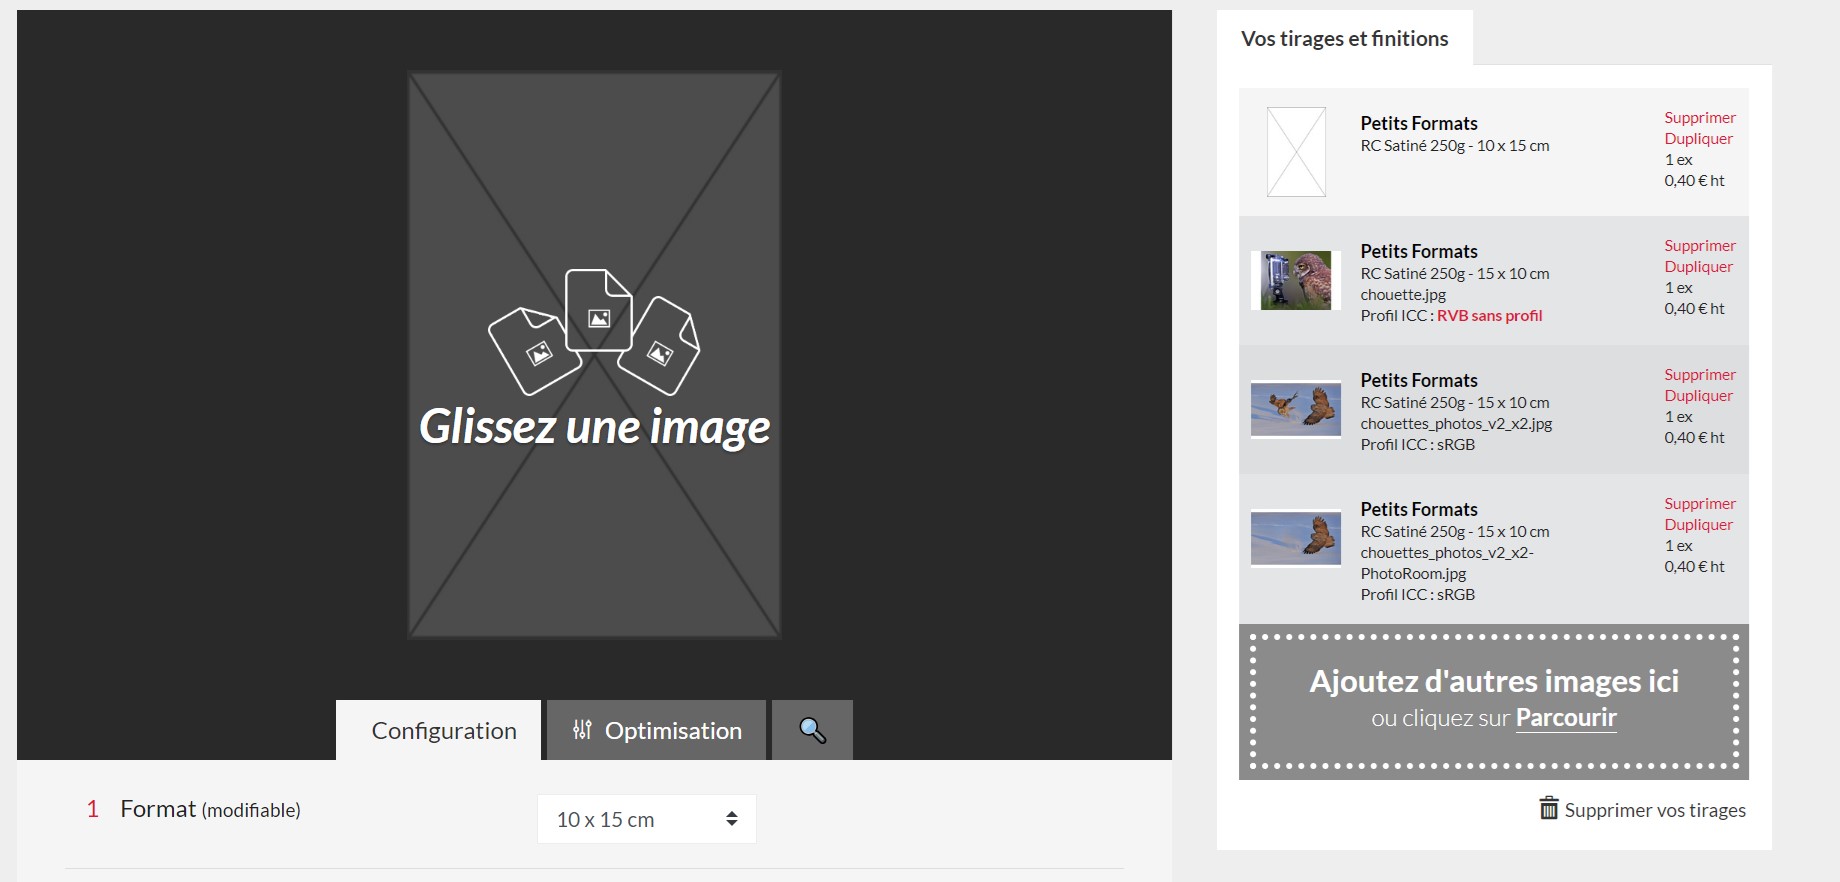
Before uploading your images, identify your print formats by adding a letter (or a number) to the beginning of your file names, for example
-
A for 10x15 cm : A_aurore.jpg, A_avion.jpg, A_ballons.jpg, ...
-
B for 18x24 cm : B_computer.jpg, B_crepuscule.jpg, B_eclipse.jpg, ...
-
C for 24x30 cm : C_homme-qui-marche.jpg, C_love.jpg,C_mer_turquoise.jpg, ...
Manage file names with "Sort by"
After uploading your images, once you have prepared your first print template by clicking on "Define as template", you click on "Apply template" and then "Modify configuration".».
In the "Sort by" section at the bottom of the window, you will find several types of sorting, including alphanumeric sorting ("Names (A-Z)"), which allows you to more easily locate the files in the same print batch.
By choosing the "Names (A-Z)" sort, the names of the images are displayed one after the other, independently of the order in which they were uploaded to the basket.
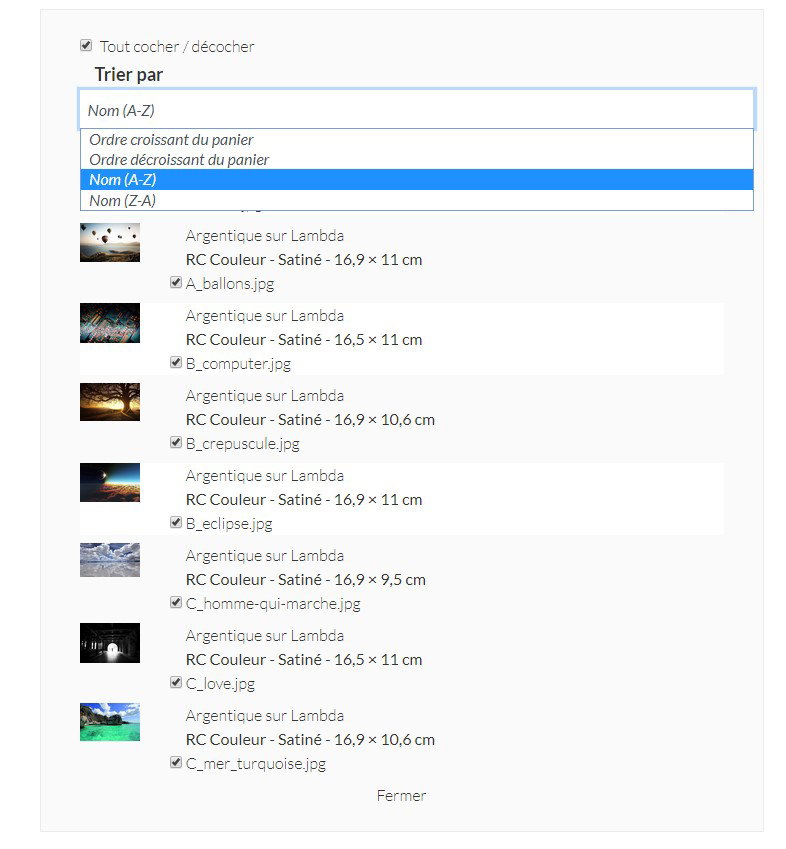
You select the files concerned by your sample print and uncheck the others, then click on "Validate": the parameters of the sample print will be applied only to the checked files.
Example of use
Your first sample print whose file name starts with A, for example A_Aurore.jpg, is for the 10x15 cm format: using the sorting by "Names (A-Z)" you can find and tick the files in the list that also start with A.
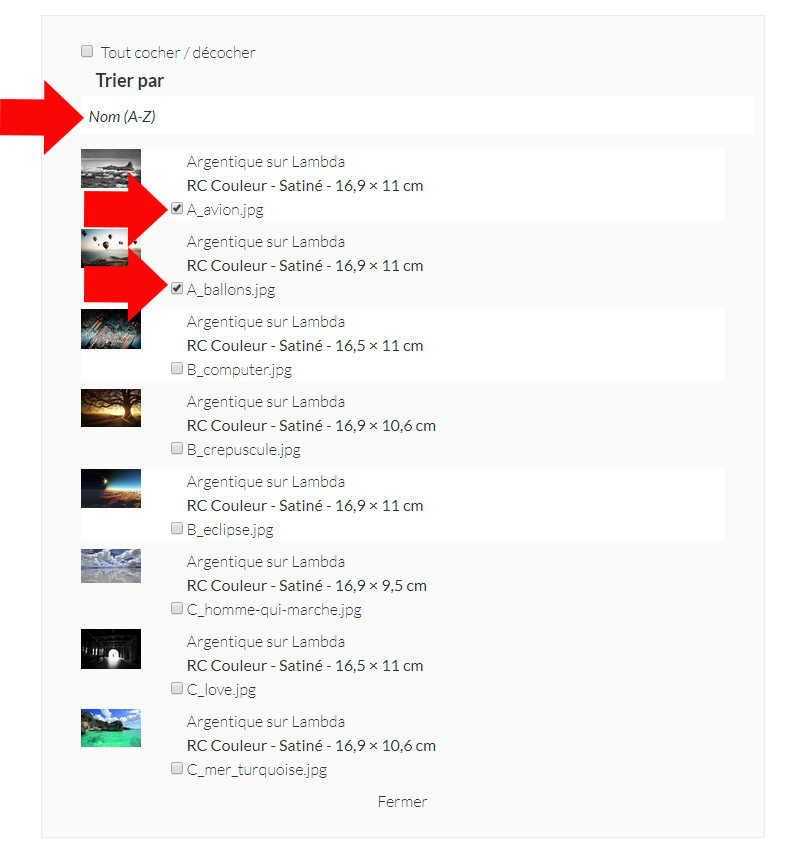
After clicking on "Submit", only the files that were checked are in the 10x15 cm format.
For the other batch of prints to be put in 18x24 cm, you define in your basket a new sample print whose file name starts with B.
By using the sorting by "Names (A-Z)" you can find and tick the files in the list that also start with B.
Once validated, only the checked files are in 18x24cm format.
For the last batch of prints to be put in 24x30 cm, you define in your basket a new model print whose file name starts with C.
By using the sorting by "Names (A-Z)" you find and tick the files in the list that also start with C.
Once validated, only the checked files are in 24x30cm format.
In the details:
Choose the parameters to be applied
-
1) Benefit: the benefit of the sample print is indicated.
-
Checked: the service will be applied to the selected prints
-
Unchecked: if you already have prints with other services, you can keep their service by unchecking Service.
-
2) Large size:
-
Checked: the largest dimension of your sample print will be applied to the selected prints. The small dimension will be automatically updated.
-
Example: your sample print is 33 cm wide x 45 cm high, the largest dimension is 45 cm. Each selected print will systematically be 45 cm on its large dimension.
-
Example: your model print is Width 45 cm x Height 33 cm, the largest dimension will be 45 cm. Each selected print will systematically be 45 cm on its large dimension.
-
3) Smallest dimension::
-
Checked: the smallest dimension of your model print will be applied to the selected prints. The large size will be automatically updated.
-
Example: your sample print is Width 33 cm x Height 45 cm, the smallest dimension is 33 cm, each selected print will systematically be 33 cm on its small dimension.
-
Example: your model print is Width 45 cm x Height 33 cm, the smallest dimension is 33 cm, each selected print will systematically be 33 cm on its small dimension.
-
4) Height:
-
Checked: the Height of your model print will be applied to the selected prints. The Height will be systematically applied whatever the orientation of the image (horizontal or vertical). The Width will be automatically updated.
-
Example: your sample print is 45 cm wide x 33 cm high, each selected print will systematically be 33 cm high.
-
Example: your sample print is Width 33 cm x Height 45 cm, each selected print will systematically be 45 cm high.
-
5) Width:
-
Checked: the Width of your model print will be applied to the selected prints. The Width will be systematically applied whatever the orientation of the image (horizontal or vertical). The Height will be automatically updated.
-
Example: your sample print is 45 cm wide x 33 cm high, each selected print will systematically be 45 cm wide.
-
Example: your model print is Width 33 cm x Height 45 cm, each selected print will systematically be 33 cm wide.
NB: Your choice of a master value, the small or the large dimension, the Width or the Height, necessarily modifies the other value.
The result of the modification may vary according to the homothety of each image in relation to the image of the model print. Once validated, we recommend that you check the final dimensions of your prints on the Summary page.
-
6) Do not change the format
-
Unchecked: The Width and Height dimensions will not be modified on the images concerned. They will remain the same size.
-
7) Paper/media
-
Checked : Your choice of paper or media will be applied to the images.
-
Unchecked = The paper or media will not be modified on the images.
-
8) Image Optimization, Protection, Adhesion, Bleed, Certificate
-
Checked: Your choice for each option will be applied to the images.
-
Unchecked : The options will not be modified on the images.
-
9) Quantity
-
Checked: The quantity present in the sample print will be applied to the images.
-
Unchecked: The quantity present in each print will be kept.
Sort the prints to be modified
The list of images contained in the basket is displayed in list mode, they are all checked by default. You can use the main box "Check/uncheck all" to quickly filter your choices.
You can sort the contents of your basket by:
-
Ascending order of the basket
-
Descending order of the basket
-
Names (A-Z)
-
Names (Z-A)